How to Manage Whatsapp Templates in Kait Dashboard?
Sep 27, 2022 6 min read
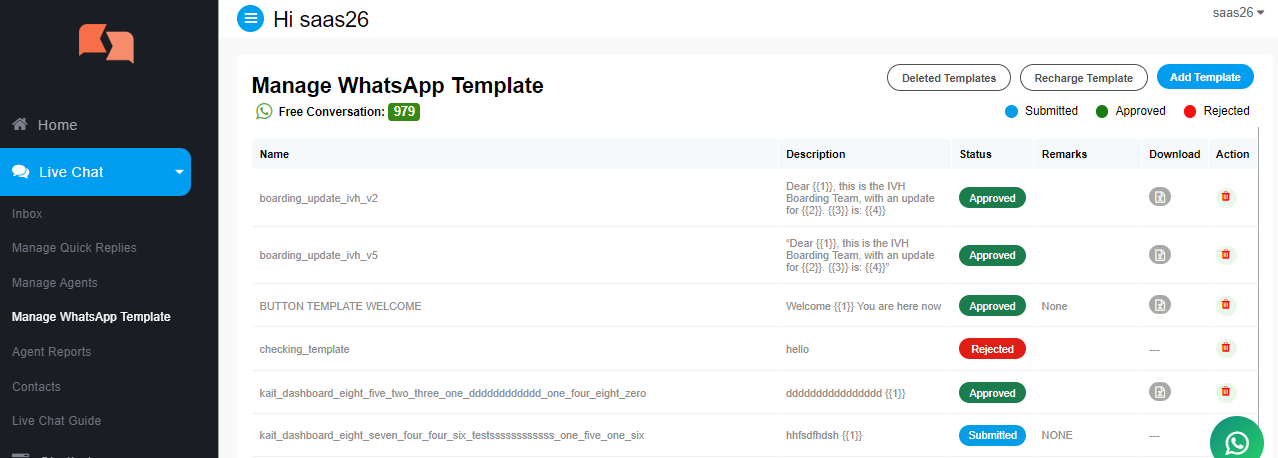
Below is the screenshot of the Manage WhatsApp Template section
For better explanation, it will be explained in points
1. Free Conversation 1000 this refers to the number of messages available, you will get 1000 free messages per month
2. Add Template this button allows you to create the template and submit it for a review by the WhatsApp team
3. Recharge Template this button allows you to recharge the templates if you have no free messages left, according to the WhatsApp terms and conditions
4. Delete Template this button allows you to recharge the templates if you have no free messages left, according to the WhatsApp terms and conditions
5. Submitted this button allows you to recharge the templates if you have no free messages left, according to the WhatsApp terms and conditions
6. Approved this button allows you to recharge the templates if you have no free messages left, according to the WhatsApp terms and conditions
7. Rejected this button allows you to recharge the templates if you have no free messages left, according to the WhatsApp terms and conditions
Details of Whatsapp Template List

1. Name: refers to the name of the WhatsApp template
2. Description: refers to the context of the WhatApp template
3. Status: refers to the status of WhatsApp template (submitted-approved-rejected)
4. Remarks: refers to the note the whatsapp team sends if the template is rejected
5. Download: allows you to download the excel sheet template to send in bulk
6. Action: refers to the option of deleting the template message by clicking on the delete link
To create a standard template
Press on Add Template button, this page will show up
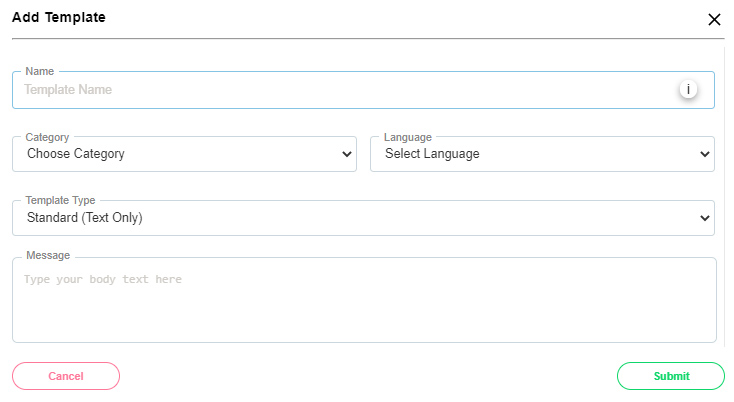
1. Name: This is the name of your template ( this icon will appear when you over the cursor on the name input field. (Note: the name of your template must be all character english, lowercase and underscore instead os spaces)
2. Category: allows you to choose the purpose of the template
3. Language: allows you to change the language of the template
4. Template Type: It allows you to pick the type of template you want whether it is standard or media
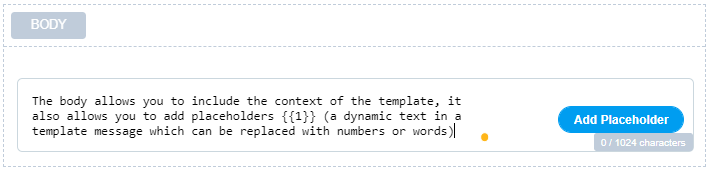
5. Message: This is where you can input the message of the template

5. To send the template to be reviewed click on Submit button or Cancel to cancel the request.
This button Add Placeholder allows you to add placeholders (placeholder is a dynamic text in a template message).
To create a Media & Interactive template
Follow the first 3 steps then instead of selecting the standard (text only) template type, select the (media & interactive) template type.
You will get more options once you select it, it will include options to add such as: Header, footer and buttons.
This type of template helps you send promotional messages and it has many other uses.
This image below shows how different this type of template is:
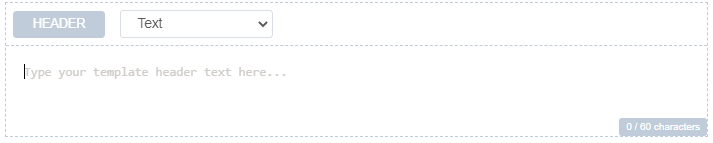
1. Header: This is how the header looks like:
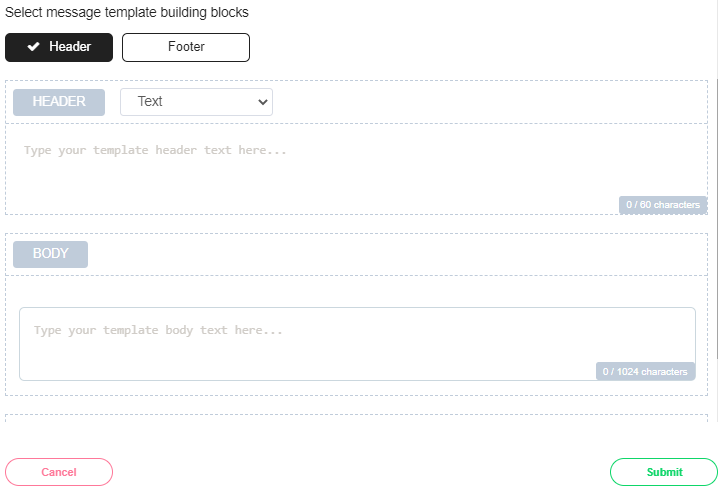
The header allows you to add other options such as (Text, Image, Video, Document) The Header field can't have more than 60 characters.
2. Body: This is how the body looks like
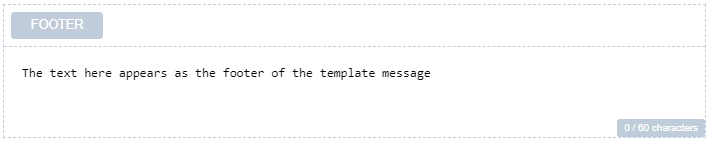
3. Footer: This is how the footer looks like
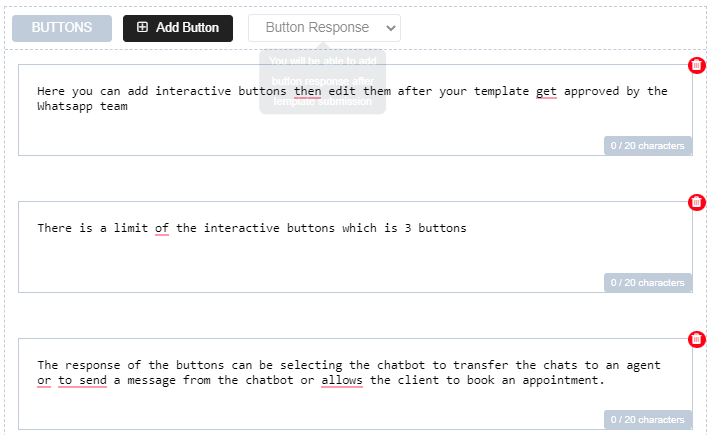
4. Button: This is how the buttons looks like
5 To save and submit the template created click on the Submit button
Special Notes
- All conversations are measured in fixed 24-hour sessions. A conversation starts when the first business message in a conversation is delivered, either initiated by the business or in reply to a user message. Businesses and users can exchange any number of messages, including template messages, within a 24 hour conversation session without incurring additional charges. Each 24 hour conversation session results in a single charge.
- The first 1,000 conversations each month are free. This way your business can build experiences your customers will love before having to pay. Each WhatsApp Business account (WABA) will receive 1,000 free conversations per month. These conversations can be either user or business-initiated. Even if a WABA has multiple numbers attached, the free tier threshold is still 1000, as the free tier is provided at the WABA level. The free tier is refreshed monthly, based on the timezone associated with the WABA.
- Conversations are not charged when users message businesses using call-to-actions buttons on Ads that Click to WhatsApp or a Facebook Page call-to-action buttons. Free entry point conversations can only be user-initiated. The first conversation that starts from the entry point is free of charge, then subsequent conversations with the user are charged.
For more information, please contact our helpline or WhatsApp us.