How to Use Flowbot using Kait Dashboard?
Sep 25, 2022 10 min read
Sign up for the KAIT dashboard account here.
After logged in to our dashboard, please follow the below steps:
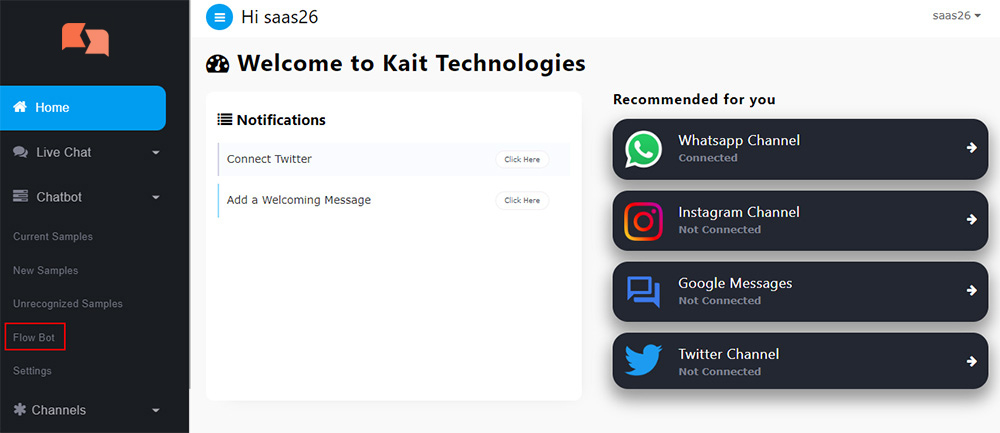
Click on Flow Bot button then you will redirect to this below page
How to Create WhatsApp Flow Bot

This button New Flow Bot will allow you to create a new chatbot, once you click on it you will be prompted with this page:
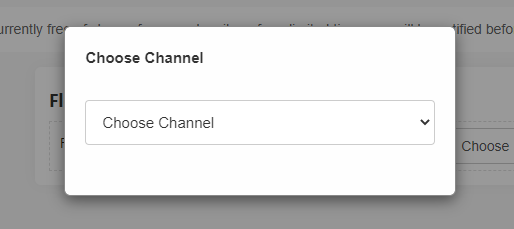
Once you click on choose channel you will get option to choose interested channel
This is how the page will look like after selecting WhatsApp:
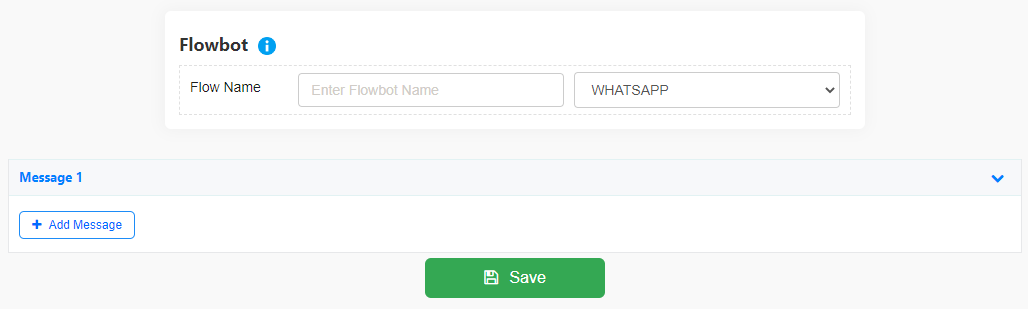
This is where you can input the name of the chatbot under the flow bot name field

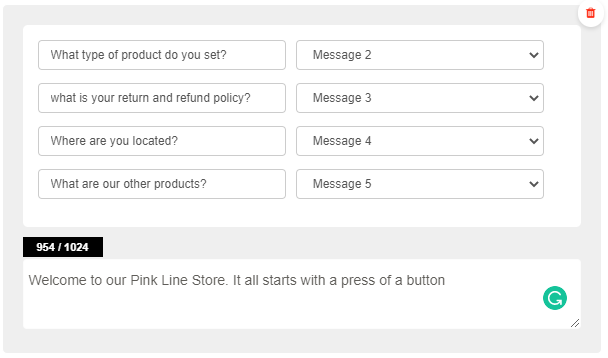
- The first message refers to the welcoming message which can include an option to select the language or the department depending on your use of the chatbot.
Responses
Once you hover your mouse over the textarea box it will turn blue and have a plus button:
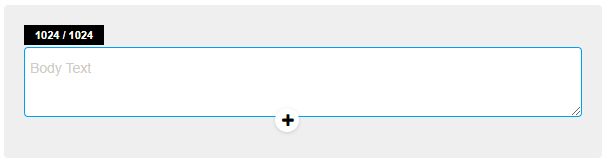
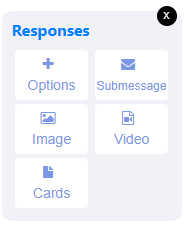
+this button allows you to add responses to your message.
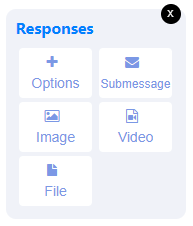
these are the response types that can be added
1. this button allows you to choose from several options to add an interactive reply.
2. this button allows you to type a sub message that would be sent separately on top of the other message you want
3. this button allows you to put an image in the message
1. this button allows you to put a video in the message
1. this button allows you to put a file in the message
Options > Button
once you click on button you will receive different choices to pick from
1. Button allows you to create interactive buttons to select from in the chat
2. List allows you to create a list with several options to select from
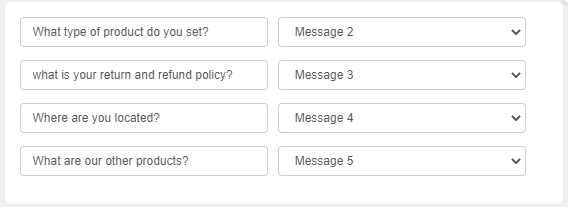
3. Numbers allows you to create a numbered response which will allow clients to type in the number to receive an answer or to continue in the flow
This is how the message will look like once you add a button to it
Add Action
Once you begin typing in the text box a Add Action button will appear to you:
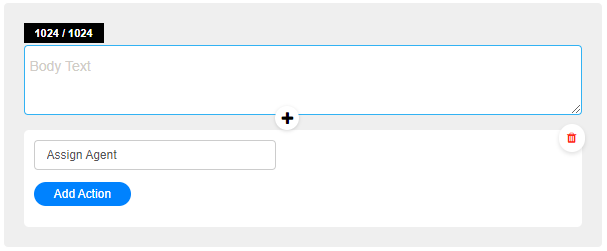
The [Add Action] button is available to the list and numbers as well.
Once you click on the Add Action button, you will receive several options to select from
Add Action Button

1. Transfer to Agent allows the chatbot to transfer the chat to an agent
2. Add a New Message allows the chatbot to display the following message or to create a new one
3. Send Ticket allows the client to send a ticket to the agent
4. Appointment allows the chatbot to display appointment slots if you set them
Transfer to Agent
Once you select Transfer to Agent this option will appear for you:

Transfer To choose options from dropdown list, this is where you can choose who you want to receive the chat
Each type of agents is explained below:
Any Agent: will allow the chatbot to transfer the chat to any active agent.
Only admins: will allow the chatbot to transfer the chat strictly to admins only.
Only agents: will allow the chatbot to transfer the chat strictly to agents only.
English Agents: will allow the chatbot to transfer messages to the agent that set their language to english only.
Arabic Agents: will allow the chatbot to transfer messages to the agent that set their language to arabic only.
Add a new Message
If you click on Add a new Message this is how the message will look like:

You can then select if you want to create a new message or to an existing message from choose message
This option can help you to either continue with the flow of the chat or add new flows
Send Ticket
You can allow the clients to send you a ticket by selecting this Send Ticket option and it will appear like this

Appointment
You can allow your clients to book appointments according to the time slots that you create which would be suitable for you, you can also add the appointment booking options in the english and arabic language.
By clicking on the Appointment button, this prompt will show which will allow you to pick the language you want from language dropdown
After choosing the language, it will show the message like this:

You can edit the messages that show with the appointment setting by clicking on the settings button, this screen will show:
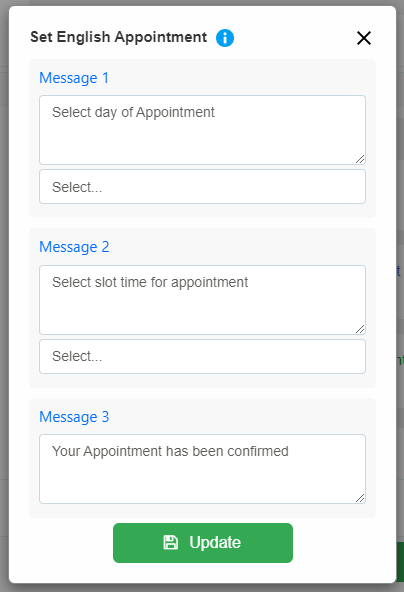
Then you can change the text according to what suits you and click on Update to save.
Options > List
To add a list to your message, click on then select + List it will look like this:
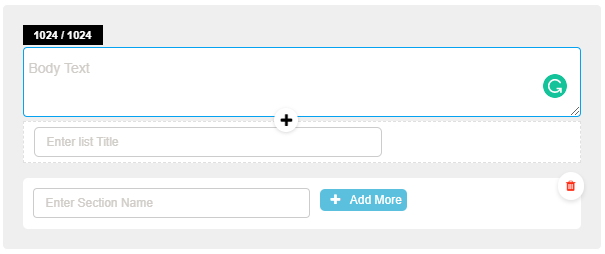
+ Add More this button allows you to add components to each section:
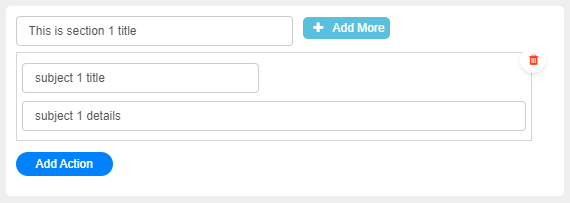
The section and subject are different because the section is the main component and the subject is a small part of it.
There is an Add Action button which will allow you to add an action based on the 4 already explained before.
If you select + the button it will allow you to add another section that would have different subjects
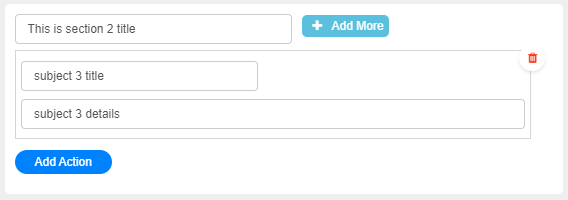
This is how the second section looks like:
This is an example of how it will look like if you added all the different actions:

Options > Number
To add a list to your message, click on then select + Number it will look like this:
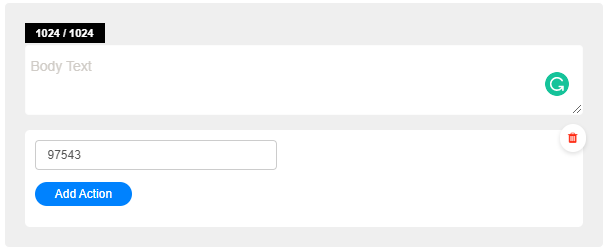
You can add as many numbers as you want as there is no limit and the button itself does not have a limit to words.
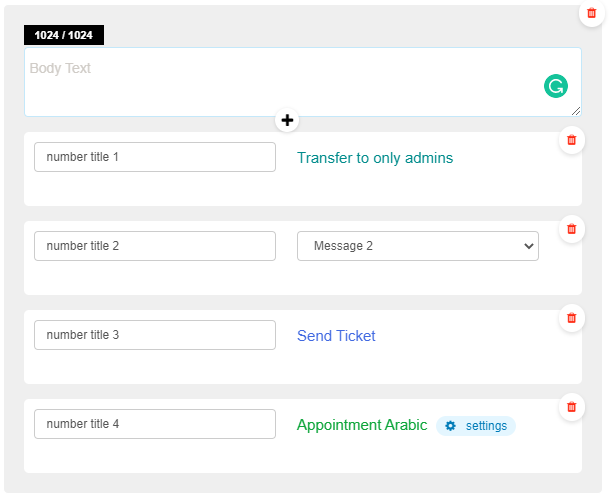
All of the numbers can have actions added to them, can be done by clicking on Add Action and then selecting the action you want.
To add a new number, click on button then press + Number to create one.
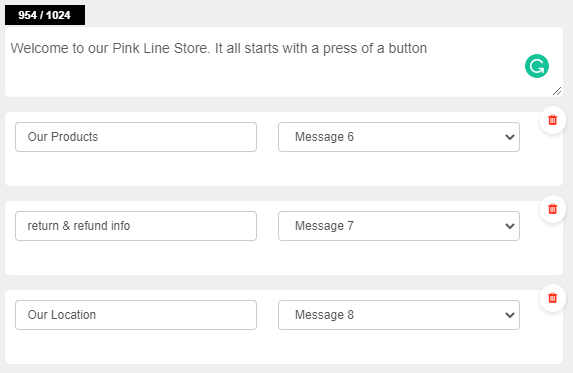
This image below shows how the numbers would look like with every action used.
- All of the above was an explanation of how every component works in the flow bot system, the flowbot of instagram differs to the one for whatsapp as instagram uses ice breakers and also instagram cards, the instagram design is simpler than the one for whatsapp but everything will also be explained in an example of a fictional store.
- As for building the whatsapp flowbot, you will start with Message 1 to write a welcoming message or introductory and you can also add 2 buttons to select the language your client wants (you can create an english flow as well as an arabic flow to give a bigger option for your clients to select from). After they select the language you can include a numbered list with what you offer as well as an option for the client to contact the customer service agent or for complaints, you can also add a list as well that would contain services or products you sell.
- The flowbot features offers unlimited flows, meaning your message options are limitless which would allow you to create a chatbot that encompasses all the information your client would usually ask for when contacting a customer service team.
- A good use for the numbers feature is that you can create a Frequently Asked Questions (F.A.Q) message which would allow you to add your most asked questions with their answers allowing ease of communication with the clients regarding their inquiries.
- You can also add an option which will allow the clients to contact your agents through transferring the chat from the chatbot to your agent.
How to Create Instagram Flow Bot
As for the Instagram flowbot, ours offers you to add ice breakers to the chat, which would almost be the equivalent of the buttons on whatsapp, the limit of ice breakers are 4 and they only show once when the client starts a conversation on the direct message the other times the client would contact through direct message it will show the first message in which you can add buttons to it so the conversation gets carried between the chatbot and client.
This is how the first message would be like:
Icebreaker
And this is how the ice breakers look like:
As for the first message that will appear if the client sends a message you can add buttons to it to resume the conversation through buttons,
there is a limit of 3 buttons. To add them click on the
+ then
then
+ Button and then
Add Action to add an action
The actions you can add to the buttons are limited to two, the Transfer to Agent which will allow the conversation to be transferred to the agent and the Add a new message which will allow you to continue the conversation with either a new message or to connect another message within the flow.
Responses
As for the responses, you can add them through clicking on + then the responses will show like below image
the difference instead of the there is a option
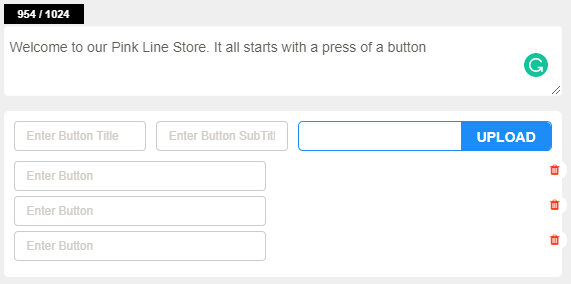
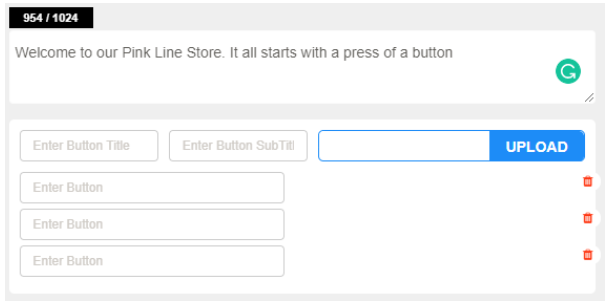
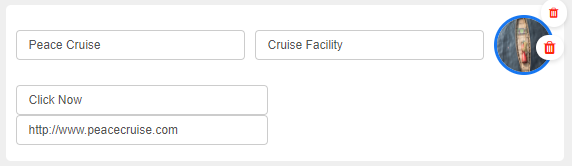
Cards
There are two types of cards
Inline Button Web view Button
To upload the image of the card, click on the Upload button
Inline Button
1. Inline Button refers to the button that includes other buttons as options. This is how it looks like
Web View Button
2. Web View Button refers to the button that will display a web page according to the link provided. This is how it looks like
For example:
For more information, please contact our helpline or WhatsApp us.