How To Use/Manage Quick Replies Feature in Live Chat
Sep 27, 2022 6 min read

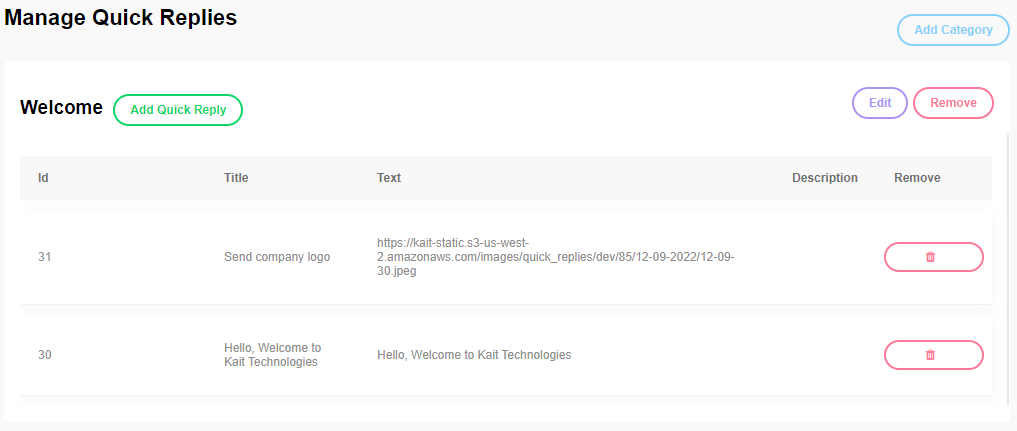
1. Add Category button allows you to add a new category for the quick replies
2. Welcome Message This text allows you to add a welcome message by clicking on the Add Quick Reply and save it
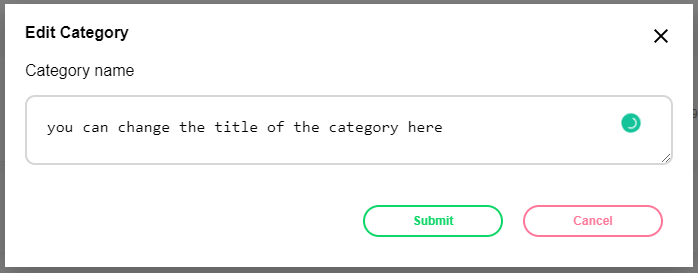
Edit Category
3. Edit This button allows you to edit the name of the category

Remove Category
3. Remove This button allows you to remove the category. below is the screenshot of the remove category

Add Category
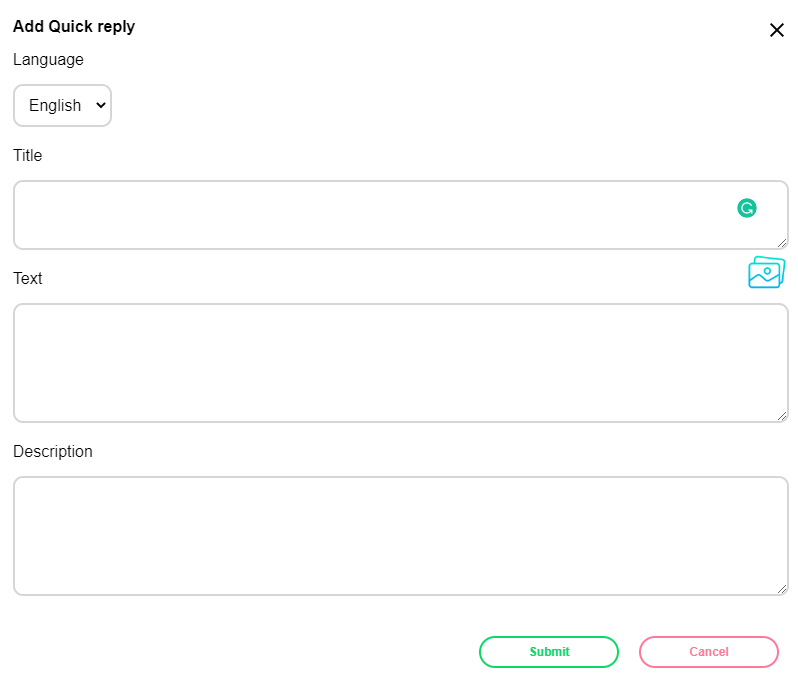
The below section will help you to create “Quick Replies”. Please refer to the instructions

1. Language: This button allows you to select the language of the quick reply
2. Title: Introduction to the "Add Quick Reply" feature
3. Text: This area allows you to input the context of the quick reply and add photos at the same time. The image will appear as link but once the reply is sent it will be an image. Adding the pictures can be done by clicking this button and selecting the image to upload
4. Description: This area here is used for you to put notes or a small summary of your quick reply, it will not appear for your client once sent
5. Language: Submit This button allows you to save the quick reply you created
6. Language: Cancel This button allows you to delete the quick reply you created
Quick Replies List
Once you have filled in all the information, it will look like this. Please refer to the image below:

1. Id: This refers to the ID number of the created quick reply
2. Ttile: This refers to the title of the quick reply
3. Text: This refers to the context of the quick reply
4. Description: This refers to the description of the quick reply
4. Remove: This refers to the option of deleting the created quick reply
5. Once you want to delete it, click on the delete icon button and you will be prompted with these options in which if “Yes” is selected, the quick reply will be deleted. If you select “go back” you will keep the quick reply
For more information, please contact our helpline or WhatsApp us.

